2022 Honda CRF250F Brake Fluid Replacement - Page 2
Previous
Road and Trail Guide
This is a step-by-step guide to replacing the brake fluid on a Honda CRF250F. It is based on the author’s observations and experience replacing the brake fluid on a 2022 Honda CRF250F (and on many other motorcycles) and on information contained in the official Honda CRF250F service manual, 2021 (part no. 61K9903).
Read all of the instructions before beginning. It may be helpful to take photos prior to removing or repositioning parts to aid you later.
Use the correct tools for the job, and take your time.
Parts and supplies you may need
- fresh DOT 4 brake fluid from a sealed container
- clean shop towels, rags, clean damp cloth
Tools you need or may find helpful
- torque wrench accurate at 5 and 12 N.m
- possibly a 3/8-inch to 1/4-inch adapter
- 1/4-inch drive ratchet, 8 mm socket
- 8-mm box-end wrench
- 7-mm box-end wrench
- #2 Philips or JIS screw driver
- brake bleeder tool or a section (60 cm / 2 feet) of clear tubing and a container (jar) to catch brake fluid
- a syringe to remove brake fluid from brake fluid reservoir / master cylinder (or use brake bleeder tool)
The clear tubing needs to fit tightly on the brake bleeder valve. The tubing that I use has an inside diameter of about 5 mm (3/16 in). You'll need about 60 cm (2 feet), but you might want a bit more. You can get tubing at a hardware or building supply store.
Torque Specifications
Front and rear caliper bleed valve: 5.4 N.m (4.0 lbf.ft)
Front and rear reservoir cap screw: 1.5 N.m (1.1 lbf.ft)
Rear brake caliper guard bolts: 11.9 N.m (9 lbf.ft)
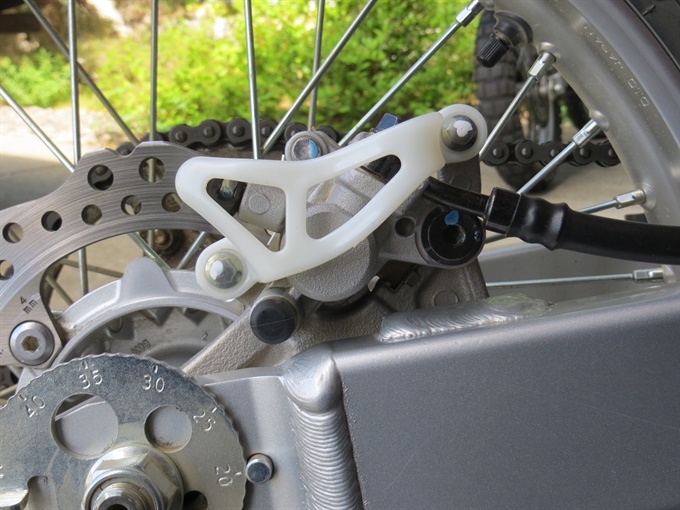
The same basic procedures apply to both front and rear brakes except for the front brake, you'll be squeezing the front brake lever, and for the rear brake, you'll pushing down on the brake pedal. The rear caliper also has a guard needs to be removed (and later installed). The rear reservoir cover also has a plastic piece (set plate) under it. Service one brake assembly at a time.
You may need a helper, especially for the front brake.
Do not replace the brake fluid in the rain or if it is windy. Brake fluid absorbs moisture. If it is windy, dirt or debris can be blown into an open brake reservoir. Avoid getting brake fluid on the brake pads and disks.
Old brake fluid is typically darker than fresh brake fluid. New Honda DOT 4 brake fluid is darker than some other brands. Apparently, it is normal for fresh Honda DOT 4 brake fluid to be an amber colour. I've also used Prestone DOT 4 brake fluid which is almost colourless (pale yellow) when fresh, making it easier to determine when new fluid has replaced the old fluid when flushing the brake system.
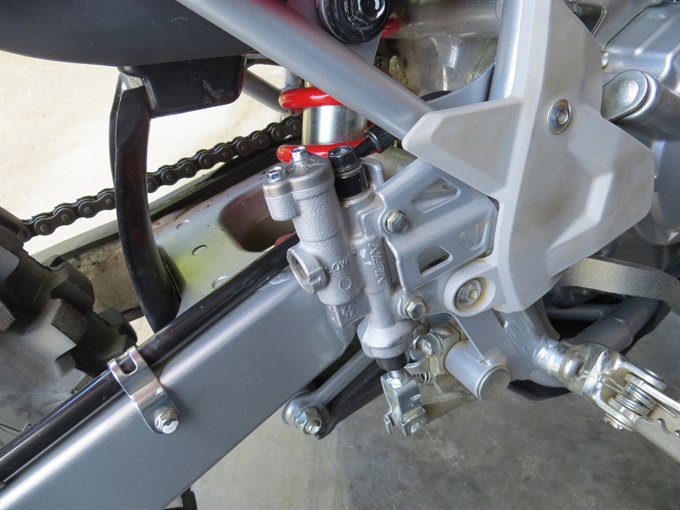
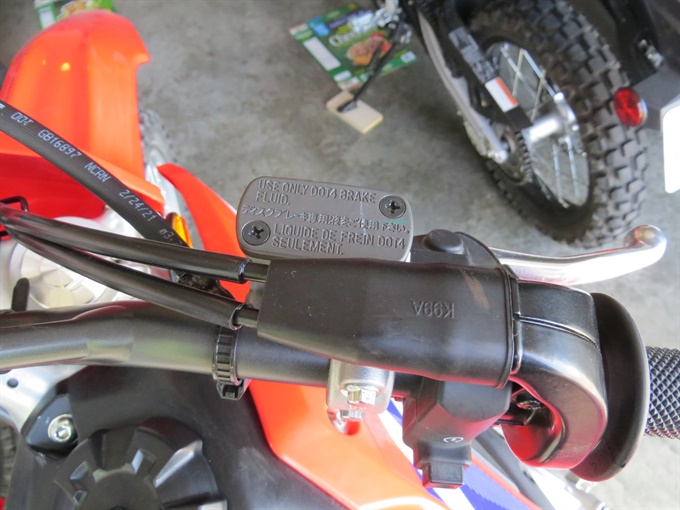
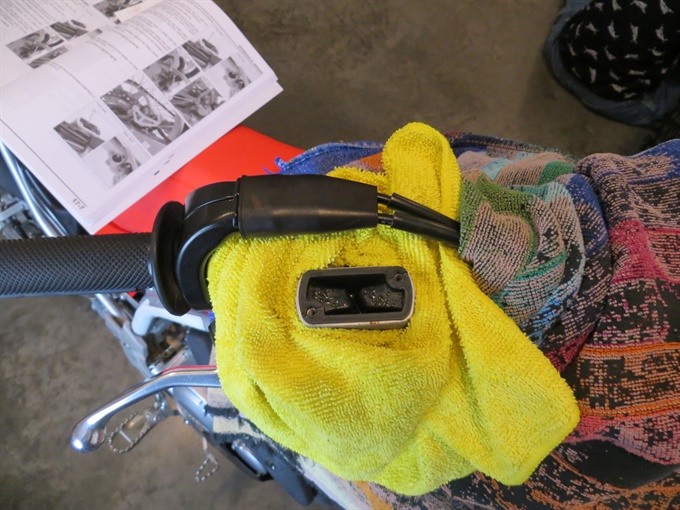
Instructions (photos follow)- Level the brake fluid reservoir (master cylinder). You may achieve this by turning the handlebars (front) or by holding the bike near vertical (rear) with a stand, block under side stand or a helper. You may also have to loosen the front brake master cylinder clamp bolts, rotate the assembly and then tighten the clamp bolts.
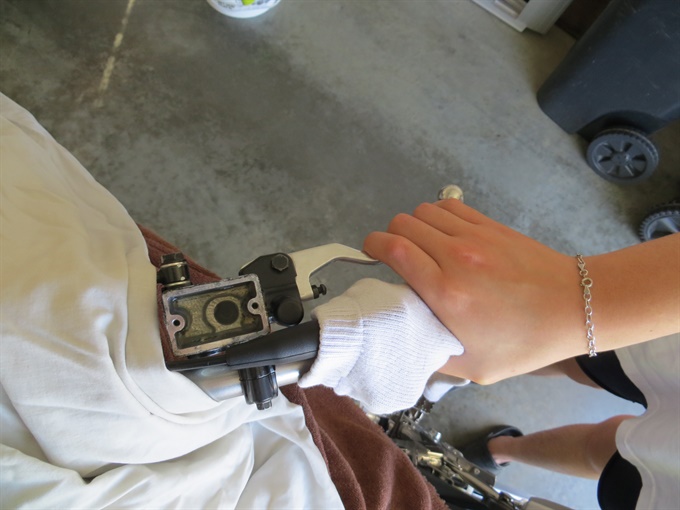
- Clean the outside of the brake reservoirs (master cylinders) and the area around them as well as the area around the brake bleeders on the calipers. Also, clean areas above the rear reservoir / master cylinder, so that dirt cannot fall into the opened reservoir.
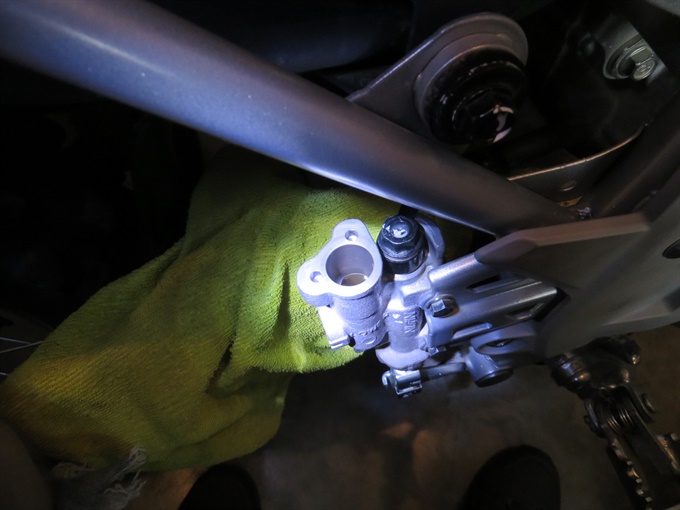
- Cover the fuel tank, tank shroud, front fender and area around the master cylinder with rags/towels to protect against spilled brake fluid. You may also want to cover the brake disks and calipers or any other areas that could be vulnerable from spilled/spattered brake fluid. Wipe up any spills immediately with a damp cloth.
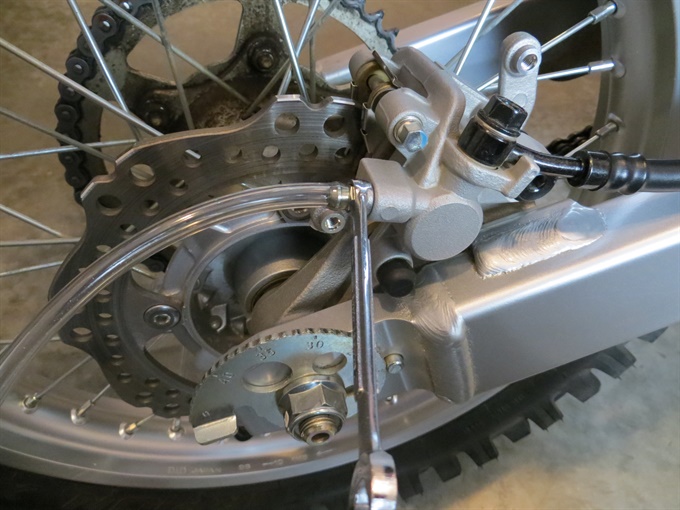
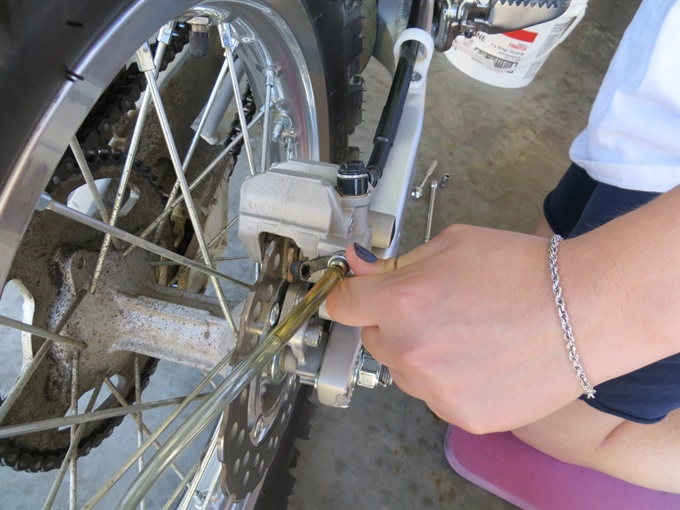
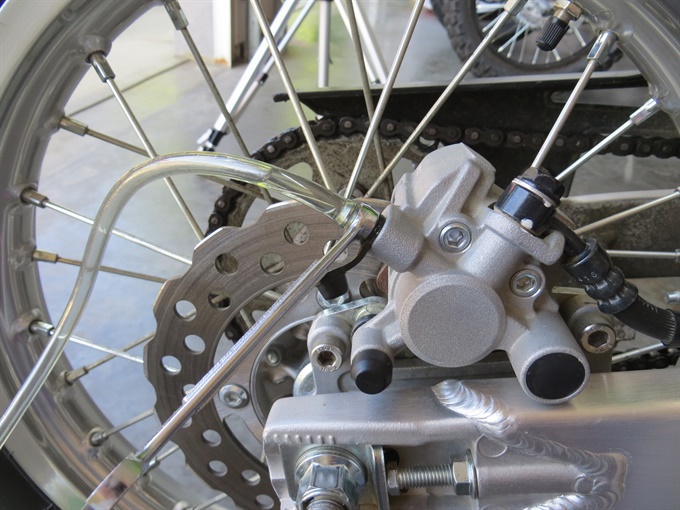
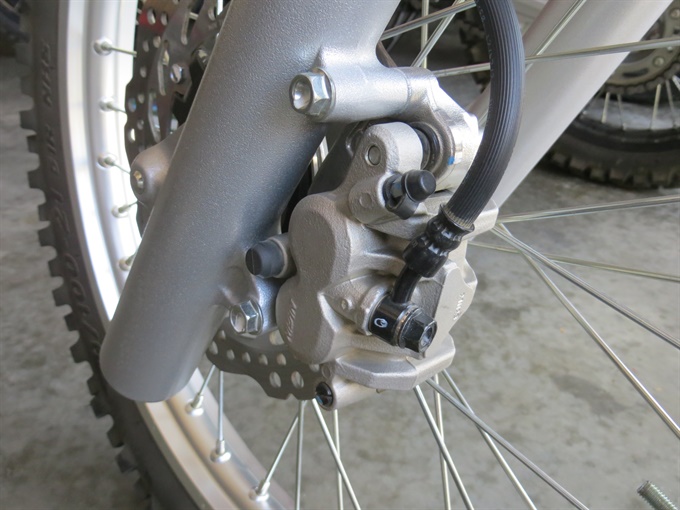
- Remove the rubber cap from the brake caliper bleed screw, and then loosen the brake bleeder valve/screw with an 8 mm socket and ratchet, but leave the valve closed (snug) for now.
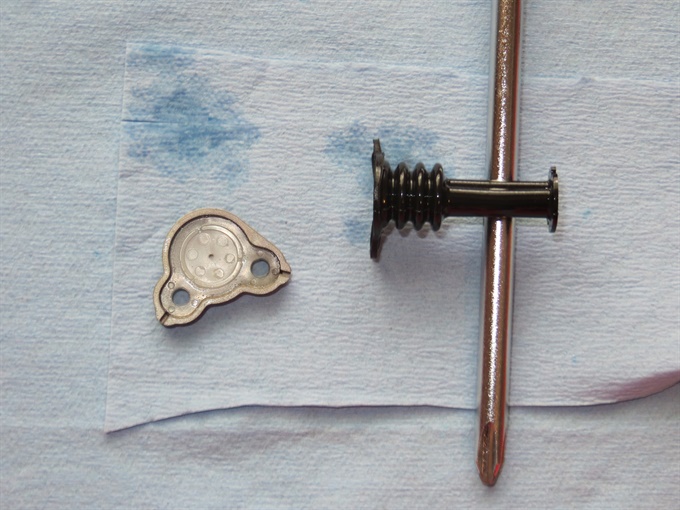
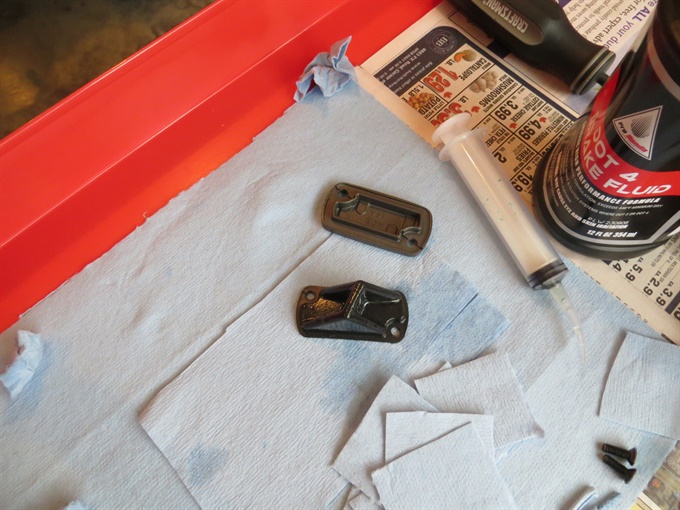
- Remove the reservoir cap, rubber diaphragm and plastic set plate (rear brake only) by removing the cap screws. Wipe away any brake fluid dribbles.
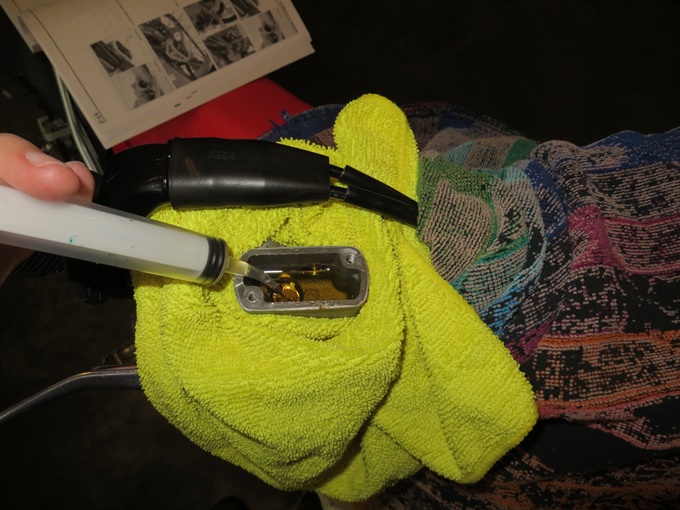
- With a syringe, suck-up as much brake fluid from the reservoir as you can, and then fill up the reservoir with fresh brake fluid. This speeds up the process and reduces mixing of old and new brake fluid.
- Place the closed end of an 8-mm wrench on the bleed valve. Position it to open and close the bleed valve (about 1/8 to 1/4 turn), but do not open the valve just yet.
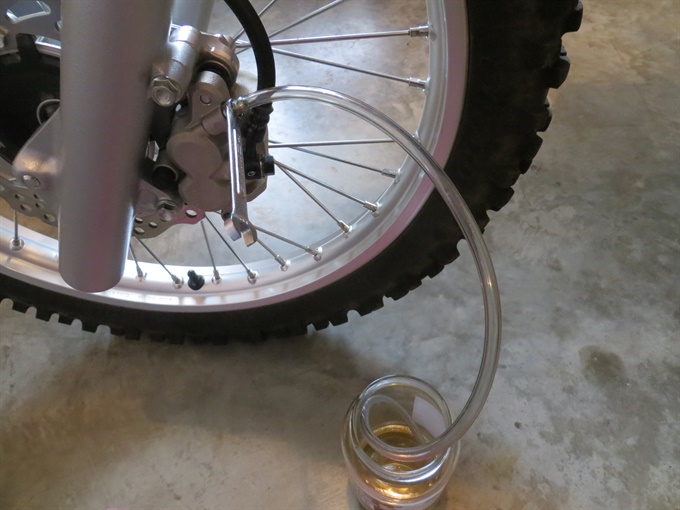
- Attach a clear (transparent) plastic hose to the bleed screw. It needs to be tight fitting. Insert the other end of the hose into a suitable container (a large glass jar works).
- Pump the brake lever/pedal several times until no bubbles can be seen rising inside the reservoir.
- Repeat the following 4 steps until fresh brake fluid and no air bubbles come(s) out of the bleed hose. Add fresh brake fluid to the reservoir as needed; do not let the fluid level get too low, or you will pump air into the system and make more work for yourself (you'll need to pump more fluid to get rid of the air).
- 1. Apply the brake and hold it (keep squeezing it).
- 2. Open the bleed valve 1/8 to 1/4 turn with the 8-mm box-end wrench.
- 3. Close the bleed valve.
- 4. Release the brake lever (pedal) slowly. The fluid level will be sucked lower. Wait a few seconds.
- Note: check the brake fluid level frequently and add fluid as needed. Don't let the brake fluid level drop to the bottom of the reservoir because air will be pumped into the brake line.
- Bleed the brake (see below) if bubbles are noted after replacing the brake fluid or if the brake feels spongy. Bleed the brakes as part of replacing the brake fluid.
- Remove the clear bleed hose (carefully to avoid splatter) and wrench, and wipe away any residual brake fluid.
- Tighten the bleed valve to 5.4 N.m (4.0 lbf.ft).
- Top-up the brake fluid to the upper-level mark, but do not overfill. There needs to be room to install the reservoir diaphragm.
- Install the reservoir diaphragm, set plate (rear only) and cap. With a clean shop towel or rag wipe away any brake fluid from the seating edge of the brake reservoir, cap, set plate and diaphragm before installing.
- Install and snug-up (lightly tighten only) cap screws/bolts.
- With a damp cloth, wipe up any brake fluid residue or dribbles.
- After changing the brake fluid, check the brake operation. If necessary, bleed the brakes.
- I take a small piece of clean shop towel, roll it between my (clean) fingers, and then insert it into the closed bleed valve to soak up any residual brake fluid in it.
- Check for leaks and proper brake function.
- Install the rubber cap on the bleed valve.
- Re-install the rear brake caliper guard and tighten the mounting bolts to the specified torque: 11.9 N.m (9 lbf.ft).
- Reposition front brake master cylinder assembly, if applicable, and tighten bolts.
- Safely dispose of used/old brake fluid. Pour into a screw-capped container and take to a recycling depot.

Bleeding the Brakes
Warning: air in the brake lines reduces braking performance. If the brake lever or pedal feels spongy, there may be air in the system, or the brakes may be defective. Do not operate the bike until the issue is resolved.
- Remove the reservoir cap (clean area first), set plate (rear) and diaphragm, and set on a clean surface. Be especially careful with the rear diaphragm. Ensure that there is plenty of brake fluid in the reservoir. Add brake fluid as needed.
- With the reservoir cap off, slowly pump the brake lever (pedal) several times until no air bubbles can be seen rising up through the fluid from the holes in the bottom of the reservoir.
- Place the closed end of an 8-mm wrench on the bleed valve and then attach as clear plastic hose to the bleed valve on the caliper (clean first) and place the other end into a container.
- Repeat the following 3 steps until no more air bubbles can been seen coming out of the bleed hose.
- 1. Pump the brake lever (pedal) until it becomes hard, apply the brake and hold it.
- 2. Quickly open and close the brake bleeder valve while applying pressure on the brake lever.
- 3. Release the brake lever.
- Notes: Do not let the brake fluid get too low. Tapping the brake line from the caliper to the reservoir may make for easier air bleeding.
- Remove the bleed hose, and wipe away any residual brake fluid.
- Tighten the bleed valve to 5.4 N.m (4.0 lbf.ft).
- Check the brake fluid level. Add brake fluid if needed (to the upper-level line), but do not overfill.
- Install the reservoir diaphragm (slowly and carefully), set plate (rear only) and cap. With a clean shop towel or rag wipe away any brake fluid from the seating edge of the brake reservoir, cap, set plate and diaphragm before installing.
- Snug-up cap bolts/screws.
- Check brake operation. Check for leaks.
- Install the rubber cap on the bleed valve.
- Re-install the rear brake caliper guard and tighten the mounting bolts to the specified torque: 11.9 N.m (9 lbf.ft).
Hold the reservoir horizontal when checking the brake fluid level. You may achieve this by turning the handlebars (front) or by holding the bike vertical (rear).
The brake fluid level in the reservoir must be kept above the lower-level line. Add fresh brake fluid if required: add fluid to the upper-level line.
I've never needed to add brake fluid between scheduled brake fluid replacement. You may need to add fluid to compensate for brake pad wear.
Previous